A practical guide to choosing and using a stamp magnifier correctly for identification, grading, and spotting flaws or forgeries.
To use a stamp magnifier, rest the stamp flat on a clean surface, hold the lens close to your eye rather than the stamp, and move the stamp slowly into focus under steady light. Done this way, a magnifier turns a blurry printed square into a clear picture of centering, colour, and fine detail you cannot see with the naked eye.
A magnifier is one of the cheapest tools in the hobby, and one of the most used. Whether you are checking a stamp against a grading guide or trying to confirm a watermark, the way you hold and use the lens matters as much as the lens itself.
What magnifier should you actually use?
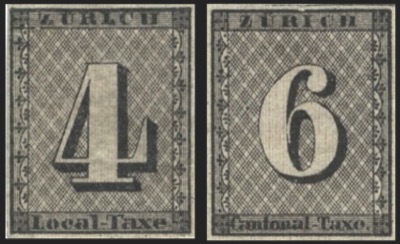
Most stamp magnifiers fall into a few categories: a simple handheld loupe, a folding pocket loupe, a stand magnifier that sits over the stamp, and a lit magnifier with a built-in LED ring. Each has a place.
- Handheld loupe (5x–10x): Good for quick daily checks, general viewing, and reading small print like plate numbers.
- Folding pocket loupe: Convenient for shows, auctions, or club meetings, since it protects the lens when not in use.
- Stand magnifier: Keeps both hands free, useful when you also need to hold a perforation gauge or watermark tray at the same time.
- Lit magnifier: Best for evening use or when checking subtle colour shading and centering, since consistent light removes a lot of guesswork.
For most identification work, 5x to 10x is enough. Higher magnification, up to 15x or 30x, is useful for checking fine engraving lines or suspected forgeries, but at that level the field of view shrinks and the image can distort slightly at the edges.
How do you hold a magnifier correctly?
Try the free stamp scanner
Photograph any stamp and let StampScan identify it and add it to your digital collection.
Get StampScan FreeThe most common mistake is holding the lens near the stamp and moving your head. It works better the other way around: hold the lens close to your eye, almost touching your eyebrow, and then move the stamp toward and away from the lens until the image snaps into focus. This keeps the image steady and lets you use both hands to reposition the stamp with stamp tongs.
A few habits make this easier:
- Place the stamp on a soft, clean surface, never directly on a hard tabletop where it can slide or scratch.
- Lift and position the stamp with tongs, not your fingers, to avoid oils and pressure marks on the paper.
- Use a light source above and slightly behind you, so your hand and the lens do not cast a shadow over the stamp.
- Keep the lens perpendicular to the stamp rather than tilted, which avoids the warped, curved distortion you get from viewing at an angle.
What should you actually be looking for under magnification?
A magnifier is only useful if you know what detail you are checking for. The main things collectors examine are:
Centering
Centering is one of the biggest factors in grading, and it is much easier to judge accurately under magnification than by eye alone. Look at the margins on all four sides of the design and compare their width. Even margins on all sides point toward a higher grade; a design pushed noticeably toward one edge lowers it. This is worth doing before you log a grade in any condition guide.
Printing detail and colour
Fine engraved lines, especially in portraits and borders, should look sharp and continuous, not broken or dot-like. A magnifier also helps you judge subtle colour shades, which matters because many stamps exist in multiple shade varieties that catalogues like Scott, Stanley Gibbons, and Michel list separately.
Perforations and paper condition
Under magnification you can spot short or pulled perforation teeth, thin spots, creases, and small tears that are invisible at arm's length. This pairs well with a proper perforation gauge check, since perforation type and condition both affect how a stamp is catalogued.
Gum and hinge remnants
For unused stamps, magnification helps you tell MNH (mint, never hinged) from MH (mint, hinged) by revealing faint disturbance in the gum where a stamp hinge was once attached. This distinction has a real effect on how a stamp is described and catalogued, so it is worth checking carefully rather than guessing.
How does a magnifier work alongside other tools?
A magnifier rarely works alone. It is usually one step in a short routine:
- Tongs to lift and position the stamp without touching it directly.
- Magnifier to examine centering, printing, perforations, and gum.
- UV lamp to check for paper repairs, reperforation, or alterations that do not show under visible light.
- Watermark tray or fluid to reveal a watermark that magnification alone cannot show.
Combining these tools gives a fuller picture than any one of them alone. This is especially true when you are trying to rule out a forgery, where printing method, paper, and gum all need separate checks, as covered in more detail in the guide to spotting fake stamps.
Where does magnification fit into cataloguing and storage?
Once you have examined a stamp closely, the natural next step is recording what you found. Note the centering, any flaws, the gum state, and the catalogue number so you are not re-examining the same stamp from scratch later. Many collectors do this directly into a stockbook or a hingeless album, with the stamp itself kept in a glassine envelope until it is mounted with a stamp mount.
If you are working through a large batch, a phone-based tool can speed up the identification side. The app can help confirm a stamp's issue and catalogue details from a photo, which you can then verify visually with your magnifier for condition and centering, the two things a photo alone will not settle reliably.
Why does careful magnification matter so much?
Two stamps that look identical at a glance can be worlds apart once you check centering, perforation condition, and gum under a lens. This is why grading matters so much when identifying and organising a collection: the difference between a well-centered example and a poorly centered one, or between MNH and MH, is often invisible without magnification.
Famous rarities make this point clearly. The Inverted Jenny and the British Guiana 1c magenta are studied down to the smallest printing and paper detail, because at that level of scrutiny, small differences carry real weight. The same principle applies, at a smaller scale, to any stamp in a beginner's collection: careful, patient magnification is what turns a rough impression into a confident identification.
Try the free stamp scanner
Photograph any stamp and let StampScan identify it and add it to your digital collection.
Get StampScan FreeWhat magnification is best for stamps?
Most collectors use 5x to 10x for everyday viewing and identification, moving up to 15x or 30x only for checking fine printing detail, tiny flaws, or suspected forgeries. Anything above 30x usually distorts the image more than it helps.
Do I need a lit magnifier?
A built-in light is not essential but it helps a lot with centering, faint watermarks, and colour shading, especially indoors. Natural daylight works well too, but a steady, even light source gives more consistent results than a phone flashlight.
Can a magnifier help detect fake stamps?
Yes. A magnifier lets you compare printing texture, line sharpness, and perforation edges against genuine reference examples. Combined with a UV lamp for paper and gum checks, it's one of the simplest tools for spotting reperforation or reprints.
Should I use a magnifier before or after using tongs?
Use tongs first to lift and position the stamp, then bring in the magnifier once the stamp is resting safely on a soft surface. Never hold a stamp with your fingers while inspecting it, since oils and pressure can damage the paper.
Is a loupe the same as a magnifier?
A loupe is simply a small, often folding magnifier designed for close inspection work, and most stamp collectors use the terms interchangeably. Loupes tend to have a fixed short focal distance, which suits the fine detail on stamps better than a large handheld glass.